.png)
View and Manage Your Bookings
Once you log in you will see your Bookings Dashboard.
Check out the articles below to learn how to view and customise your Bookings Dashboard so that you can manage your bookings.
Each column in the bookings dashboard represents an important detail about your booking. There are a number of columns on your dashboard for you to view, go to our Glossary to learn more about what each field represents.
How-To View your Booking's Details
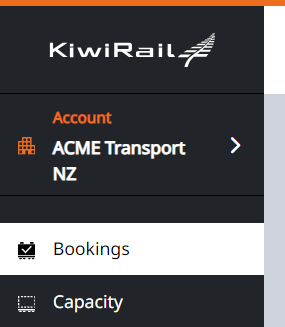
Once logged in, your Bookings Dashboard will load automatically. To navigate to the Bookings Dashboard from another page, click “Bookings” in the menu bar.
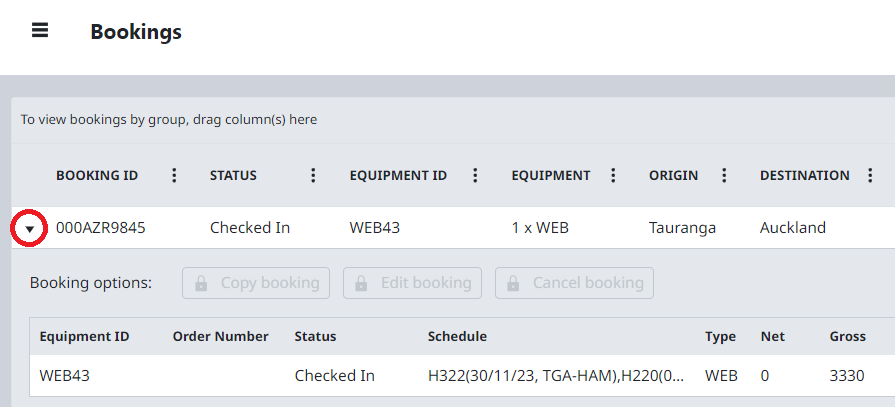
A list of bookings and their details will be displayed on your dashboard.
Note: You can scroll horizontally on your dashboard to view more booking detail columnsTo view the Equipment details of a specific booking, click the arrow to the left of the Booking ID.
Your booking dashboard will display the next 7 days of departing freight by default. Unscheduled freight can be found via Filter Your Bookings
Viewing base committed bookings online
Every Monday morning, new unconfirmed base bookings will be able to be viewed in your booking dashboard on the KiwiRail freight portal.
While you have unconfirmed base bookings, a banner will be displayed at the top of the booking dashboard as a reminder there are still bookings to action.
Any base bookings that are still unconfirmed past the due date and time will be removed from the dashboard and the banner will not be displayed.

Review and confirm an unconfirmed base booking
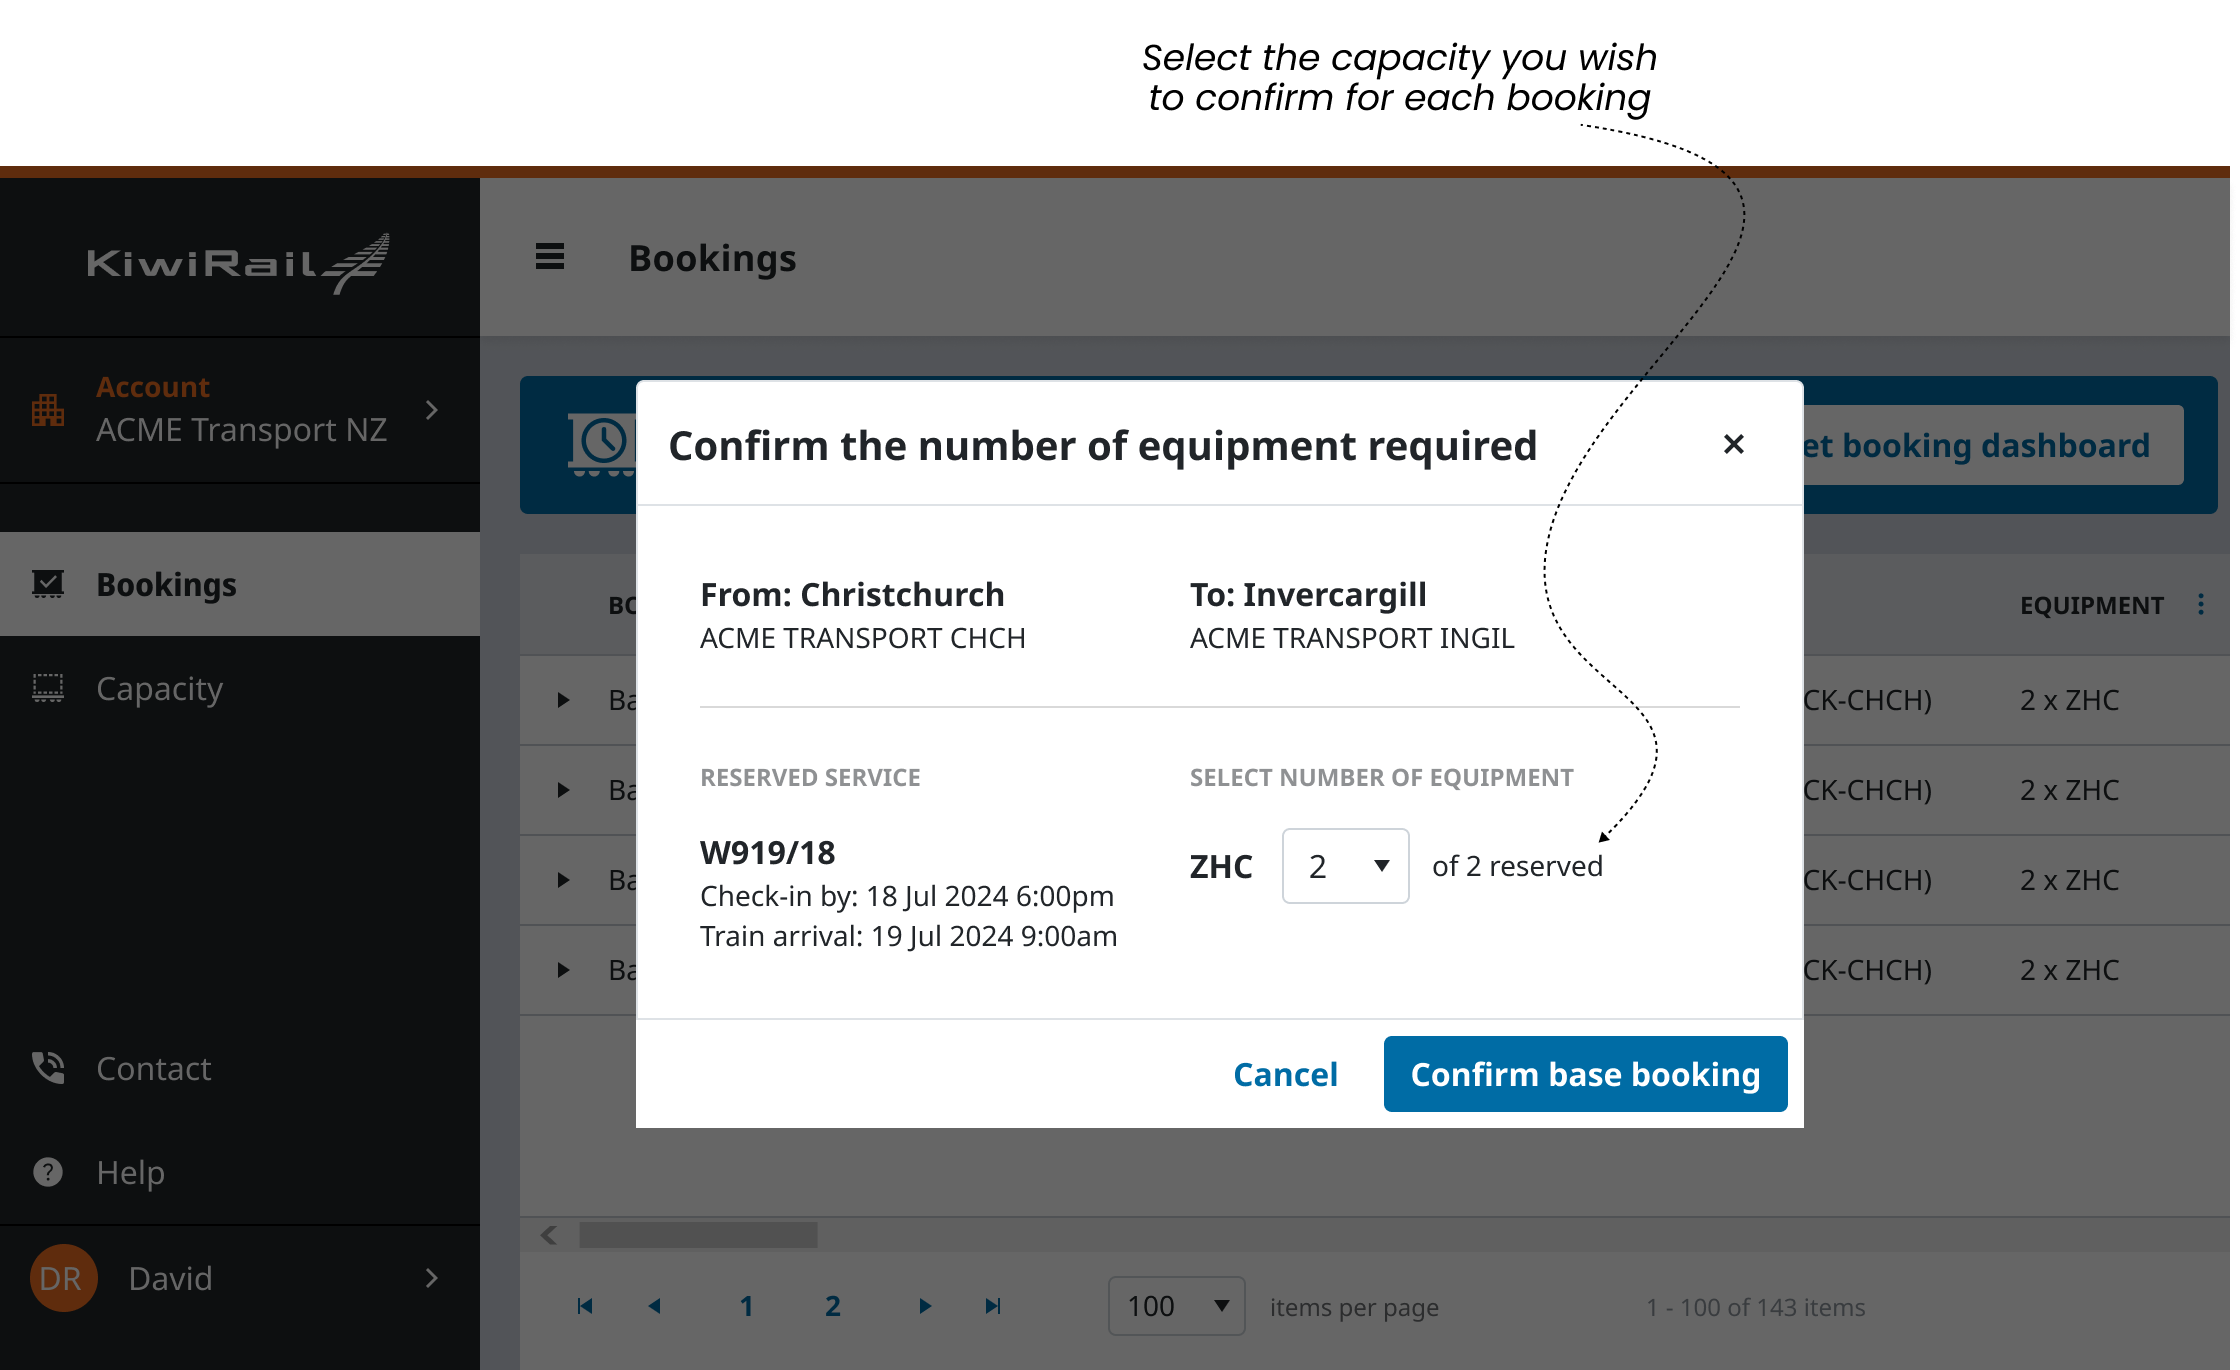
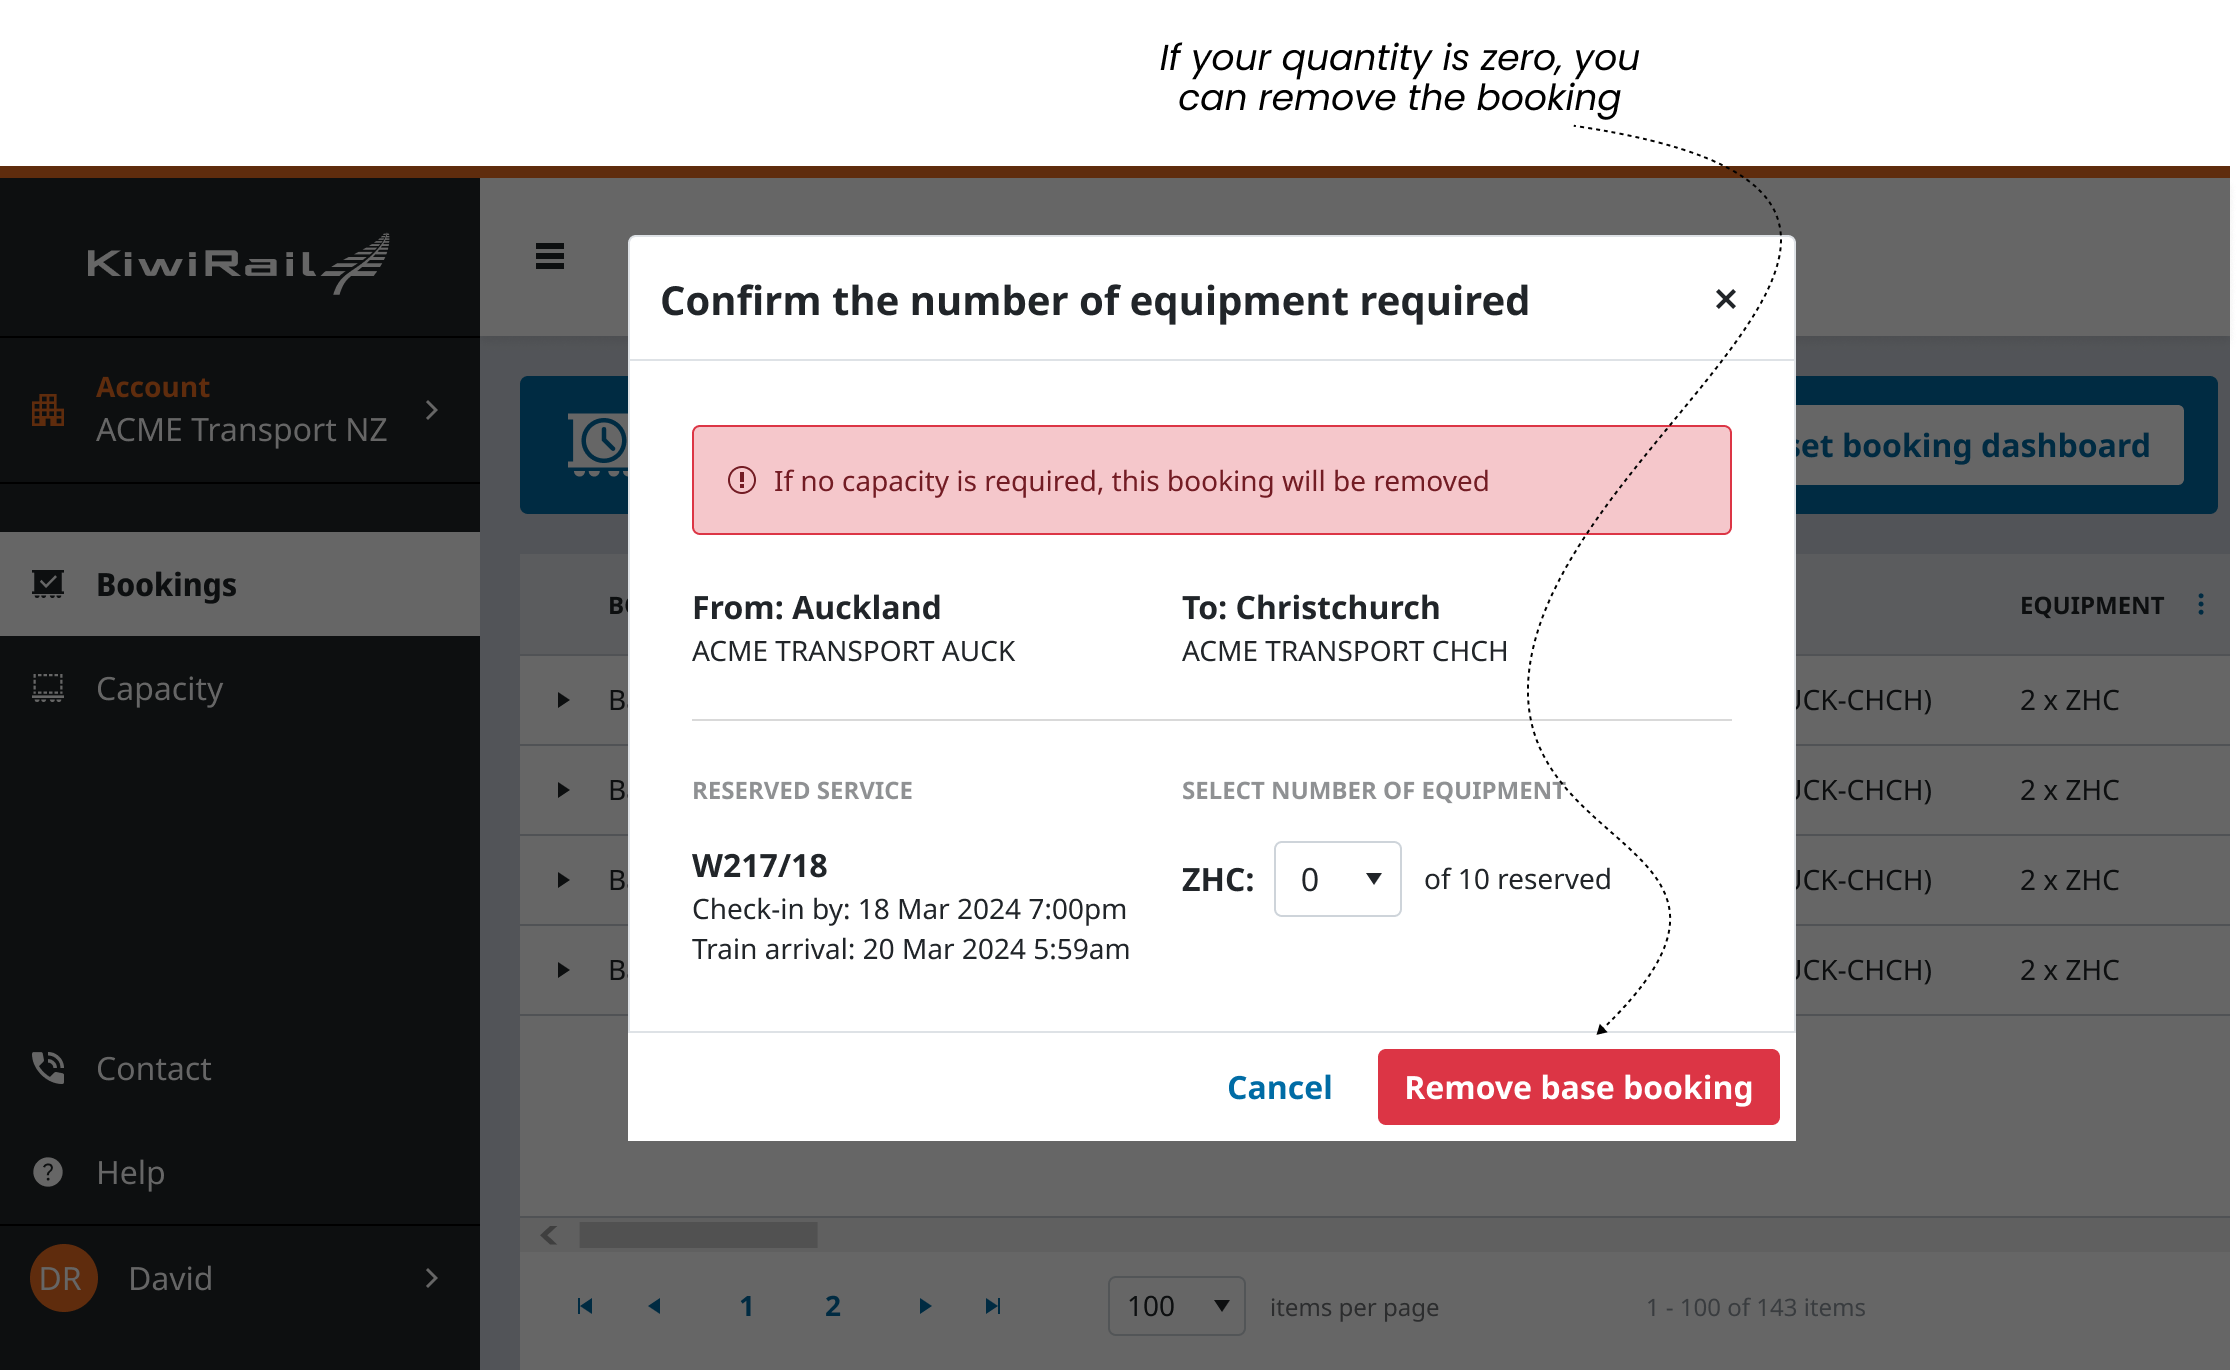
Selecting to review an unconfirmed base booking will display the core details that make up the booking.
It will also show the type and number of equipment that has been reserved. You can choose to reduce the number equipment needed and continue to confirm the booking.
Note: If you wish to increase the capacity or change any of the details of this unconfirmed booking, you can do so through the usual “Edit booking” process. You will still need to review and confirm the booking after it is edited to finalise the booking.
Creating a new booking with your additional capacity requirements will be fully flexible and not subject to fixed booking terms!
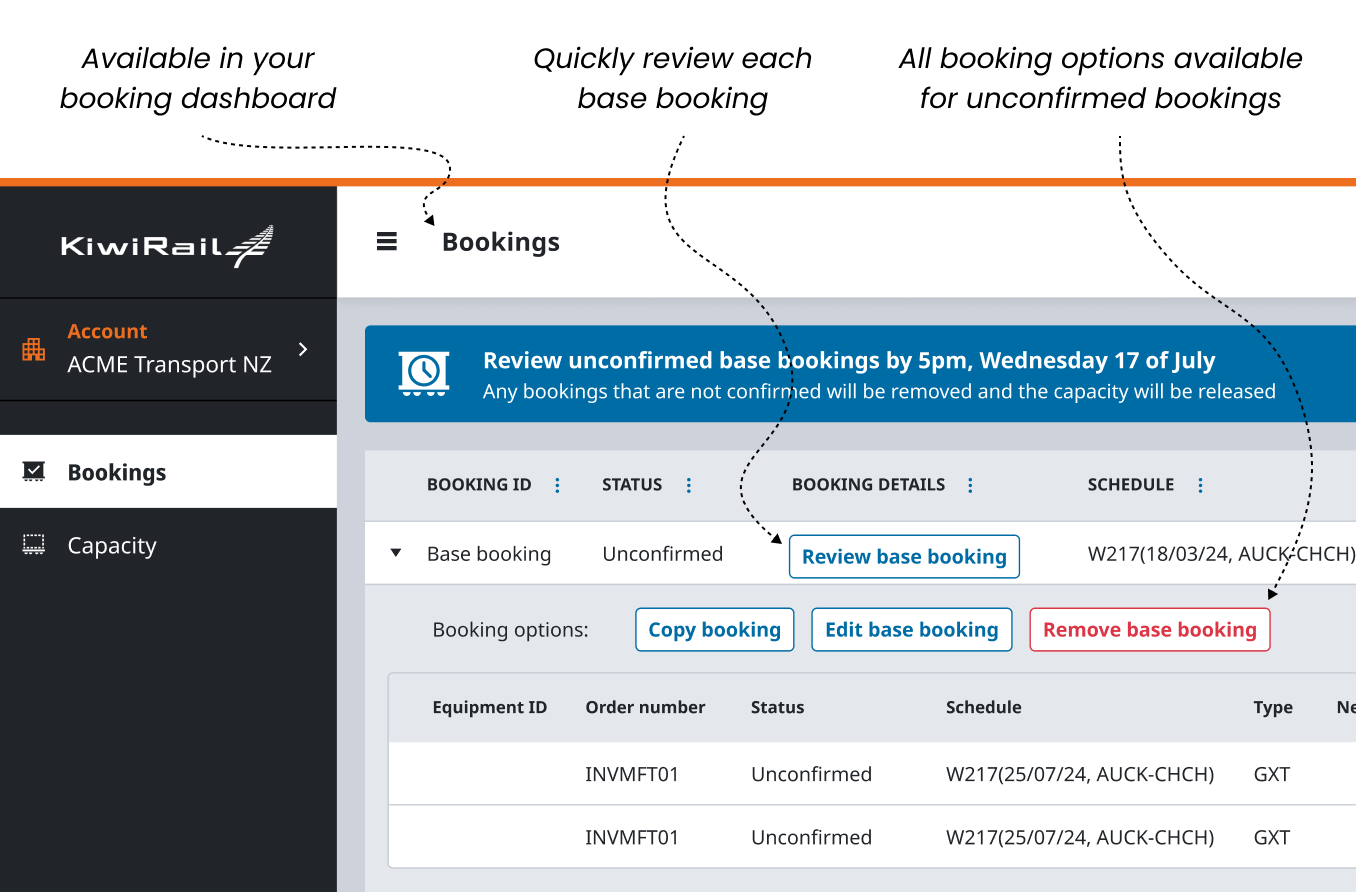
Removing a base booking
At any time before the expiry date, you can choose remove an unconfirmed base booking.
This unconfirmed booking will no longer appear on the booking dashboard.
This will not impact future reservations.
If you would like some training with this new process, please reach out to our teams by emailing domestic@kiwirail.co.nz.
The Bookings Dashboard will initially show your bookings that depart in the next 7 days. If you want to find any other bookings, you’ll need to apply filters.
How-To Filter Your Bookings
When you load the Bookings Dashboard, a default filter is applied on Departure Date to find any bookings departing in the next 7 days.
Click the Filter button to show the search criteria available. Clicking Filter again hides the options.

The available criteria are categorised into date and reference fields:
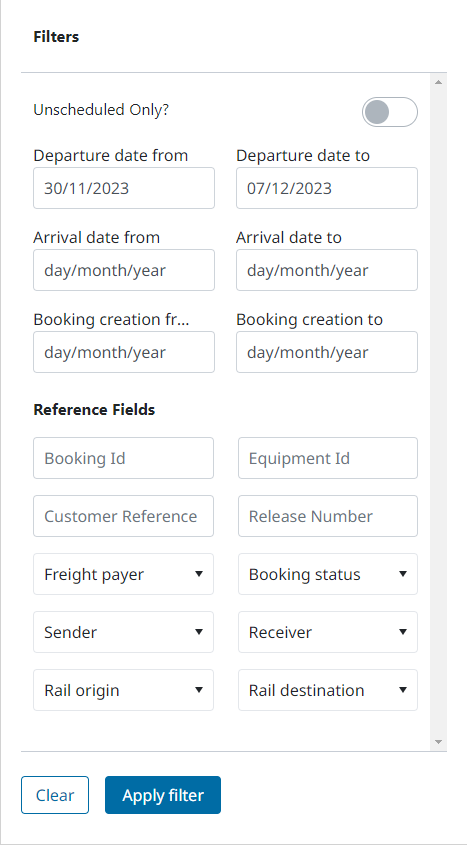
Date Fields - Calendar date selectors enable you to refine your search around departure, arrival and booking creation dates. If you’re looking for unscheduled equipment, click the “Unscheduled Only” button.
Reference Fields - A combination of free text fields and drop-down selectors enable you to search for specific references, statuses, origins, and destinations.
Enter Date and Reference data that match the bookings you want to see.
Click Apply Filters to load all your matching bookings on the dashboard.
On the Bookings Dashboard you can only view bookings that you have permission to see (if your company is the booker, payer, sender, or receiver).
If you are having trouble finding a booking that should be available to your company, get in touch with your company’s account admin to ensure you have the right freight payer code permissions.
How-To Save or Load Your Filters
Once you have applied filters on the Bookings Dashboard, you can save those filters and the current dashboard configuration for use in future. You can find these by clicking “More Options”
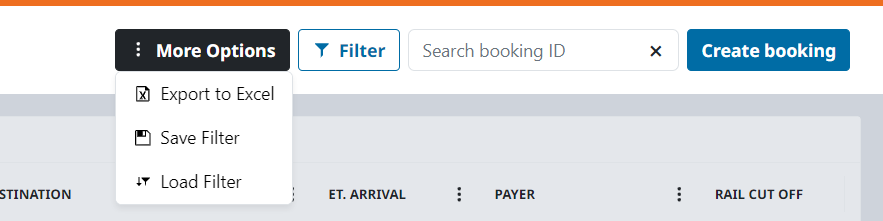
Click Save Filter to save your currently applied filters and dashboard configuration.
Click Load Filter to load your saved filters and dashboard configuration.
Save Filter also saves the dates you’re looking at so it can do the exact same search again. If you’re not finding the bookings you’re expecting, double check your date filters.
Each column in the Bookings Dashboard represents an important detail of your booking. There are several columns on your dashboard for you to view, and you can choose what columns are displayed and where.
How-To Hide or Show a Column
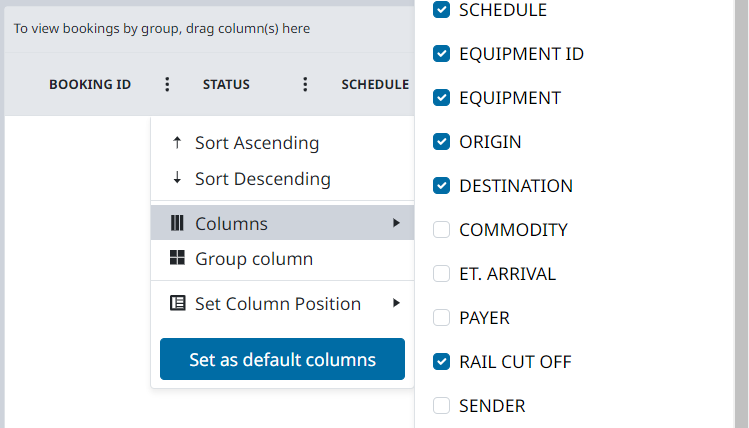
On your bookings dashboard, Click the ⋮ button beside any column name to open the column settings
Select the columns option to view a list of the columns that are active and inactive.
Add or remove any columns to suit your needs best.
How-To Change a Column's Position
On your Bookings Dashboard, Click a column heading to grab onto it and Drag it sideways to a different position on your dashboard and it will snap into a new place once you release it.
You can also use the “Move previous” and “Move next” options if you are not able to click and drag.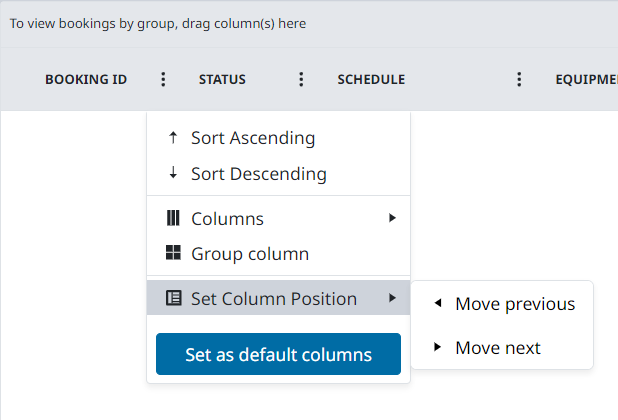
How-To Set Your Column as Default
On your bookings dashboard, Click the ⋮ button beside any column name to open the dashboard settings.
Click the Set as default columns button
How-To Export your Booking Data to Excel
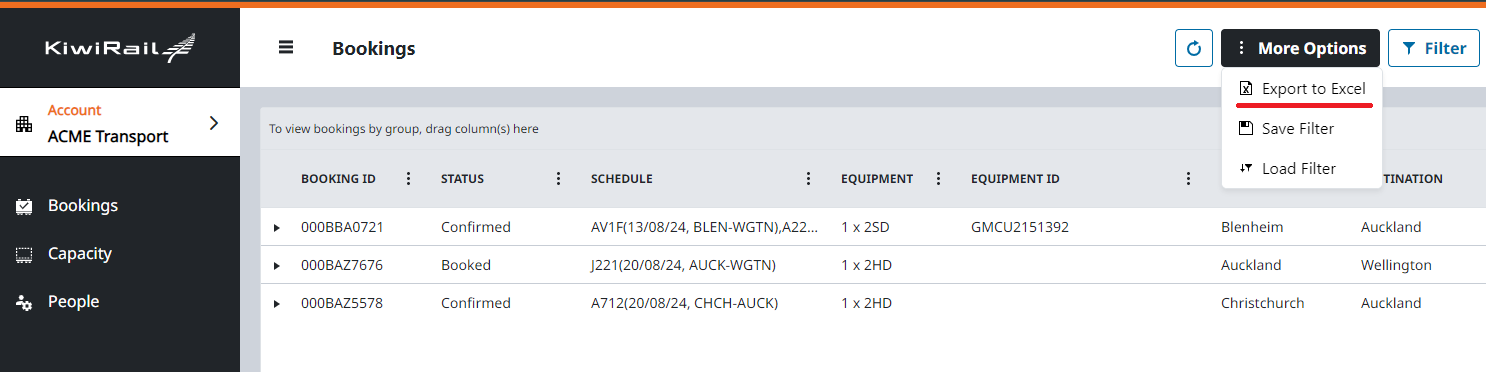
Use the filters to find the bookings you want to export.
Click “Export to Excel” under inside ‘More Options’ to export the bookings on the current page to an excel workbook.
You can increase the number of bookings on the page by choosing “ALL” for items per page.
An excel file will be created and downloaded to your default download location. The file is named “Bookings”, If an existing file of that name exists, it will add a number in brackets after the name e.g. Bookings (1).xlsx
To easily make a new booking with the same information as a previous one, you can use the "Copy Booking" feature. This will duplicate all the details you entered before, except for the dates and equipment IDs.
How-To Copy your Booking
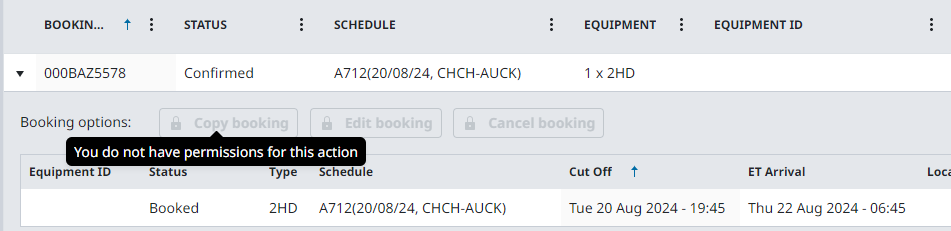
On the Booking Dashboard, click the arrow next to the booking you want to copy, then click “Copy Booking”.
You’ll be taken to the create booking page with all the same details except for the dates, equipment IDs, and services.
Select the dates and review the prefilled details for any that you want to change.
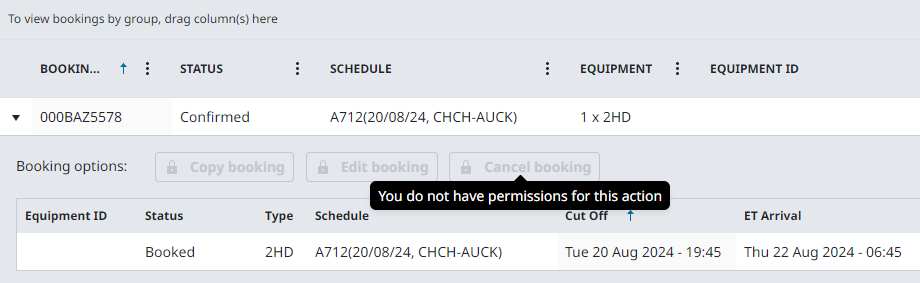
Note that you can only copy a booking that you have permission to edit. If you do not have permission the button will be greyed out:
If you need to edit a booking after it’s been created, you can do that on the Bookings Dashboard.
Edit your Bookings Online
You can make changes to your freight bookings at any time online, but there may be some situations where you are not able to make certain changes depending on the status of your shipment. For instance, if your shipment has already been picked up and is on its way to its destination, it may be difficult or impossible to make changes to the booking. The specific policies and limitations on changes will vary depending on the terms of your booking agreement.
you cannot modify a booking that is complete as all equipment in the booking have been delivered to the Receiving Customer.
you cannot modify any equipment that are in transit or delivered because they will already be on a train or are at the destination. For changes to equipment in transit please contact us and we’ll see what we can do to help.
you cannot cancel a booking that is in progress or complete as the booking has one or more equipment checked in or delivered, having generated a pending or sent invoice for the freight.
How-To Edit your Booking
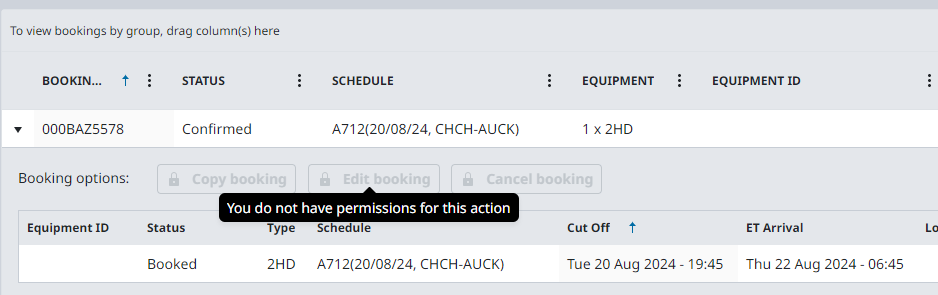
On your Booking Dashboard, find the booking you wish to make a change to and Click the Edit button to view the booking summary.
Click the Edit button on the section you want to make a change to and it will be displayed in full for you to edit.
To save your booking change, Click the Complete button on the final review page.
You can only edit bookings that you are the Freight Payer of. If you don’t have permission to edit the button will be greyed out:
If you need to cancel your booking, you can do that on the portal dashboard.
How-To Cancel your Booking
On your Bookings Dashboard, find the booking you wish to cancel to and Click the Cancel Booking button.
If you want to give us a reason for the cancellation, type it in here. Then click Cancel Booking.
You can only cancel bookings that you have permission to edit. If you don’t have permission to edit the button will be greyed out:
Booking changes may result in surcharges. Before editing or cancelling bookings, make sure you’ve read our Booking Surcharge Overview.